Java Integration
Transform Anything with Java
HelloWorld using RESTful Web Service
1. We will develop a basic HelloWorld application using REST and deploy it to a weblogic server and test the same.
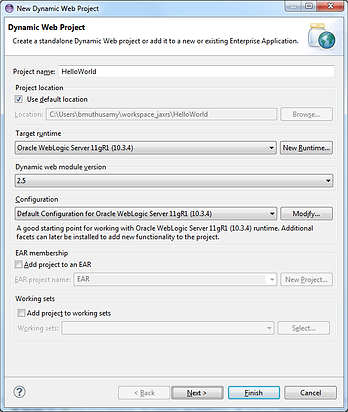
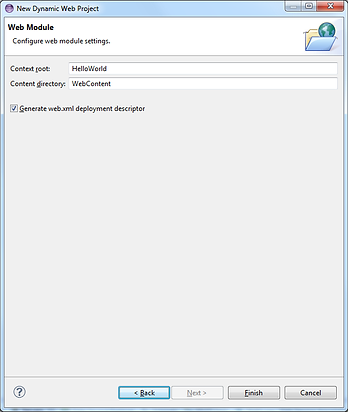
2. Open Eclipse and create a DynamicWeb Project named HelloWorld. During the wizard make sure that you choose "Generate web.xml".
3. Download the Jersey library files for JAX-RS(https://jersey.java.net/download.html)
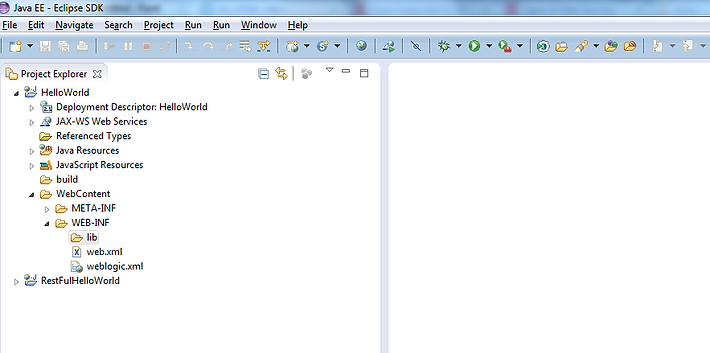
4. Place a copy of the library files inside the project HelloWorld > WebContent > WEB-INF > lib
5. Edit the web.xml as per our requirement. The servlet configuration and mapping are necessary for REST to work.
com.sun.jersey.spi.container.servlet.ServletContainer is the package from where the REST service will work.
com.helloworld.rest is the package in which we will write our classes.
/rest/* refers to the URL that we will use to access this application.
<?xml version="1.0" encoding="UTF-8"?>
<web-app xmlns:xsi="http://www.w3.org/2001/XMLSchema-instance" xmlns="http://java.sun.com/xml/ns/javaee" xmlns:web="http://java.sun.com/xml/ns/javaee/web-app_2_5.xsd" xsi:schemaLocation="http://java.sun.com/xml/ns/javaee http://java.sun.com/xml/ns/javaee/web-app_2_5.xsd" id="WebApp_ID" version="2.5">
<display-name>RestFulHelloWorld</display-name>
<welcome-file-list>
<welcome-file>index.html</welcome-file>
<welcome-file>index.htm</welcome-file>
<welcome-file>index.jsp</welcome-file>
<welcome-file>default.html</welcome-file>
<welcome-file>default.htm</welcome-file>
<welcome-file>default.jsp</welcome-file>
</welcome-file-list>
<servlet>
<servlet-name>Jersey REST Service</servlet-name>
<servlet-class>com.sun.jersey.spi.container.servlet.ServletContainer</servlet-class>
<init-param>
<param-name>com.sun.jersey.config.property.packages</param-name>
<param-value>com.helloworld.rest</param-value>
</init-param>
<load-on-startup>1</load-on-startup>
</servlet>
<servlet-mapping>
<servlet-name>Jersey REST Service</servlet-name>
<url-pattern>/rest/*</url-pattern>
</servlet-mapping>
</web-app>
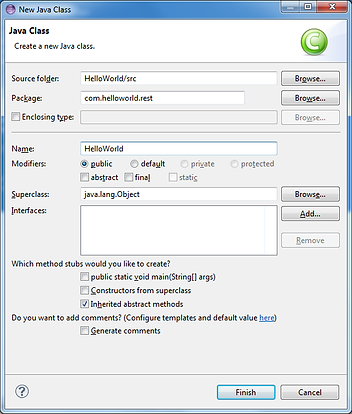
6. Now let us create a package and a class within that.
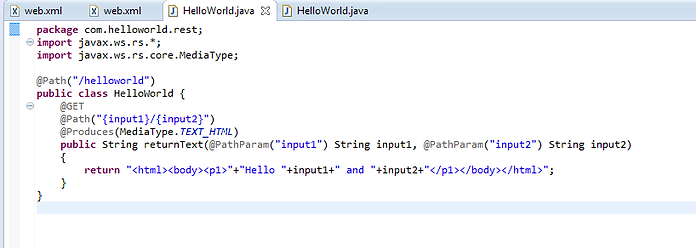
7. We will use the below annotations in the program.
-
@Path("/helloworld") : This will append to the URI to access the class.
-
@GET : Represents HTTP get. Anything that is called from the browser as per HTTP protocol is a get method.
-
@Path("{input1}/{input2}") : Used to get arguments into our program.
-
@Produces(MediaType.TEXT_HTML) : Says that the service will respond to the request in HTML.
Below is the program.
package com.helloworld.rest;
import javax.ws.rs.*;
import javax.ws.rs.core.MediaType;
@Path("/helloworld")
public class HelloWorld {
@GET
@Path("{input1}/{input2}")
@Produces(MediaType.TEXT_HTML)
public String returnText(@PathParam("input1") String input1, @PathParam("input2") String input2)
{
return "<html><body><p1>"+"Hello "+input1+" and "+input2+"</p1></body></html>";
}
}
8. Right click on the project > Export > WAR File. Eclipse will package the application into a war file.
9. Login to weblogic console > Deployments > Install > Choose the war file and deploy the same.
10 For testing we have to use the URL below.
http://servername:port?/HelloWorld/rest/helloworld/in1/in2
/HelloWorld is the project context.
/rest is from web.xml
/helloworld is from the @Path annotation of the class
The two inputs are the @Path annotation of the method.
